Wednesday 28 September 2011

Magical story book box. By Zuzu

Hello again. I (Zuzu) am here for my last Design team piece as guest designer for September. I loved it as guest designer seems to make me feel I need to try and pull all the stops out as a thank you for the trillions of Stamps Jennie sent me. So here I have an ongoing project that I started a couple of months ago when Hels first offered me the guest designer spot.

It's a box type cupboard that was filled with little hard back books. I altered the box and am in the process of altering the little books that go inside. I am showing you the parts that involve stamps from "The Artistic Stamper".


Here is the box front, very "secret Garden" and mystical. As the box was full of books I am keeping to a fairy tale and book theme on the outside too. Time because stories are timeless. We can see a fairy on the front, Tinkerbelle from "Peter Pan" perhaps, as well as the "secret garden", there is an ancient Egyptian beetle crawling across it as I was always interested in adventures from far off lands, especially Egypt; there is a swallow from "Swallows and Amazons".

On one side I have featured Alice in wonderland (Using the Mabel Lucie Attwell Alice in Wonderland stamps).

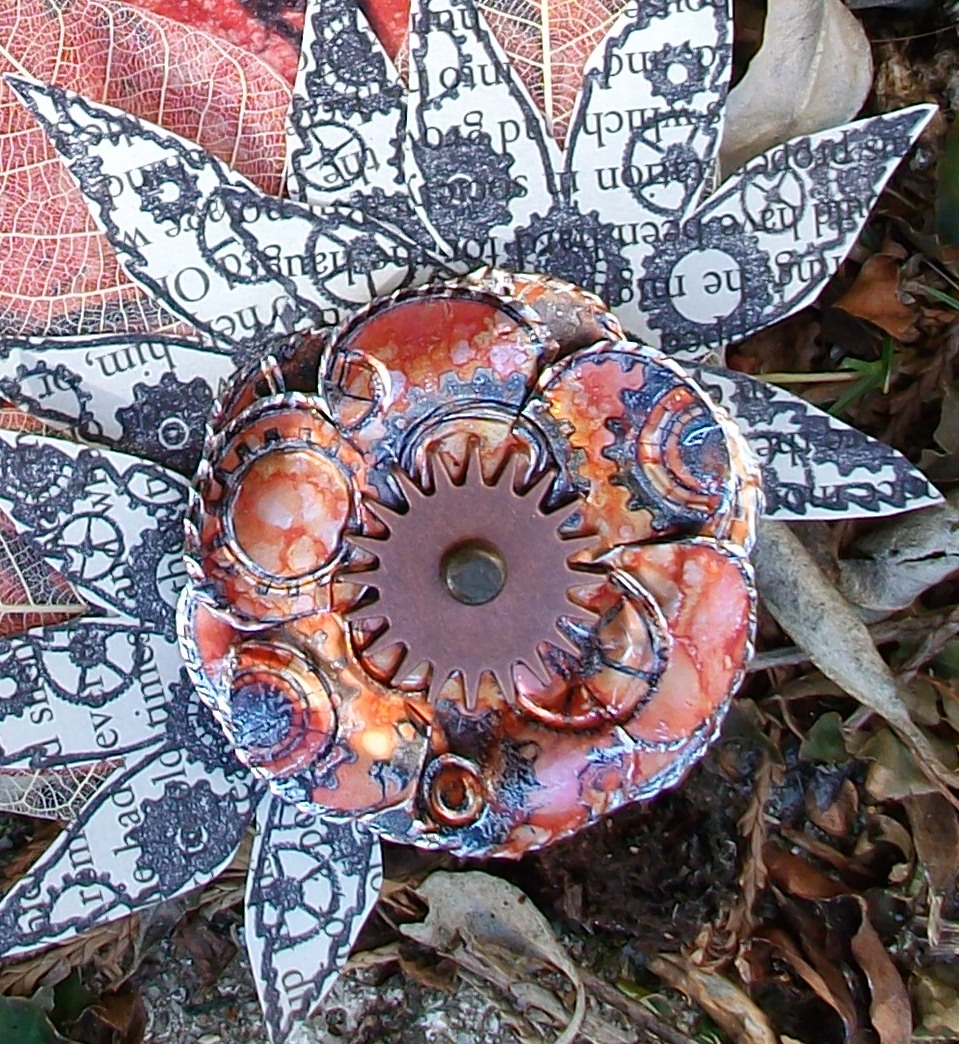
I wont go on about the outside and get on to showing you the inside as this is where the little books are that I've altered with Artistic Stamper Stamps...When you open the door and look inside there are more cogs, lots of rust and some stamping on the edges of the cupboard shelves (Using the Tick Tock plate).

Each of my wee books has its own theme, each called "the little book of...." and its theme added. Previously I did "The little Book Of Egypt" and "The Little Book Of Insects"... Today I am showing you "The Little book of time" and "The Little Book Of Childhood"....

Here is The Little book of Time:


And here is the Little Book of Childhood.

List of Items used from The Artistic Stamper.

Stamps used from the steampunk section HERE.

Phineas Pinchbeck
Goose Grease
Tick Tock

Stamps used from the Mabel Lucie Attwell section HERE.

Mad Hatters Tea Party
White Rabit

Other Stamps used.

Music Background HERE
Childhood Dreams HERE
Our Little one's HERE

From the Tim Holtz Ideaology range HERE
gears,
little bottles,
game spinners
locket key
Link
Watch and cog metal disc charm, and crown charm; HERE

Inks used were ;

Stazon (jet black)
distress inks (I used 7 different shades)
Gleam wax polish (gold tones)

That's all folks. My guest month is over. Thank you for your support and kind comments. and Thanks to Jennie and Hels for having me :)
Z x

Tuesday 27 September 2011

Hanging out! by Nicky Cresswell

Hay Stampers.. 
Here I am with my last piece of the month
I have to say that the Tissue Tape product focus this month has been a bit challenging for me as I had not really used it b4, So I think I got as much inspiration as you guys did with all the amazing things the team came up with this month. So a big round of applause to my fellow teamies xx 
Right onto my project:
 I opted for a simple little wall hanging as I had a piece of corrugated card just sat on my desk wishing to be used up!
I covered a piece of 4x6 card in the ticket tissue tape from the journeyman set.
Next I stamped the large fab family scene from the 'family values' set onto a piece of acetate with stazon ink
{I used a mix of brown & black}
I placed the acetate image over the tissue taped card, but the image just faded away, so I gave the tissue a coat of picket fence distress stainand that really made the image pop but the cool thing is your still able to see the tissue images which makes for a fab muted background.
Then it was just a case of assembling it all onto the corrugated card, Adding some hanging holes and a couple of Timmy die cut flourishes.
And your done.
I hope you liked my last project of the month
Until next time: 
Stay Inky

Sunday 25 September 2011

FREE AS A BIRD TAG

Hi all,
Kat here,
I'm here today with my third & final piece for the month,
the design team focus is on Tissue Tape
I got so involved with playing with the distress stains
I forgot to take any step by step pictures, so I will talk you through the proses.
Here's my tag,

I started by gluing torn bits of book page to the tag with
Matte Medium & brushing the medium randomly
over the whole tag to create a resist,
then with pale blue acrylic paint,
splodged onto my craft sheet,
I dipped the Small Cog Stamp into it & stamped it on the tag,
next I took tumbled glass & bundled sage Distress Stains
covered the whole tag & wiped off the excess straight away,


with Jet Black archival ink, I stamped the
I added a strip of Tissue Tape near the bottom edge,
then took ten seconds studio copper metal & tools,
stamped the cogs & the phrase as shown
to make a couple of embellishments, & stuck them on.


the Tissue Tape bow was made by
pulling some off the roll & twisting it to make a strand,
I arranged it into a bow & tied it with string,
I added it to the top of the tag & glued a
vintage button to the center.


for the bird,
I die cut him, ran him through a cuttle bug
with a texture fade embossing folder,
then inked him up with vintage photo Distress Ink
added an eye with black enamel,
the wing is made with black UTEE
& rubbed over with inka gold
I gave him a crown for his head &
drew a branch for him to sit on.


That's it,
Hope you like him!

see you next month,
have a creative day,
Kat x.

Saturday 24 September 2011

Flower Garden by Alison Hall

Hello Stampers! Today I have a piece of hanging art to share with you. I've carried on the theme of this month's Artistic Stamper Challenge, which is Numbers. There's still time to take part if you haven't already. I've also used Tissue Tape, which is currently on special offer on The Artistic Stamper website HERE.

For the blue background, I first painted a piece of 10 x 7 inch mountboard with Claudine Hellmuth Modern Red Studio Paint. When this had dried, I applied Picket Fence Crackle Paint all over it. Once this had dried, I carefully dotted Faded Jeans Distress Stains all over. I put a dollop of Studio Matte Multi-Medium on my craft sheet, then painted this all over the stained crackle, which helped to blend the Distress Stain, & once dry, would seal the crackle in place. A few bits came away, showing the red paint beneath, which gives it a cool distressed look. Once this layer was dry, I used cut & dry foam to apply Peeled Paint Distress Ink to the edges.

The background for the flowers is a piece of 6.5 x 4.5 inch mountboard. I stamped the numbers background from the Family Values Plate four times, then applied Peeled Paint Distress Ink to the edges. I used an On The Edge die to cut a border out of mountboard, for the flowers to sit in. I painted this with Peeled Paint Crackle.

I cut some Mini Rosettes from some paper from Tim Holtz's Seasonal Stack, then applied a strip of Tissue Tape all along the straight edges, before making up the rosettes. For the stems, I wrapped Tissue Tape around some wooden coffee stirrers, then coloured them with Meadow Alcohol Ink. I stamped Stitchel Dotty Dot leaves onto green paper from the Seasonal Stack, then cut them out. I glued the flowers to the number background, added the green border, then stuck this to the blue background.

I punched some butterflies out of the Seasonal Stack paper, then added tiny silver buttons (coloured with a silver krylon pen) to their bodies. Then I added silver buttons to the flower centres.

Finally, I punched holes in the top of my artwork with a Cropadile, added silver eyelets & some wire to hang it with.

I hope you like it, I had fun making this piece!
Thanks for looking,
Alison xx

Friday 23 September 2011

Ally Pally- Big Stamp & Scrapbooking Show

Hi it's the boss here today, and in the frenzy to get ready for Ally Pally Big Stamp & Scrapbooking Show, I almost forgot to post here! But never fear, I am always up early, so here I am!
If you are coming along, we have so many new goodies for you.. all of our stamps, just in, the new Snow Cap white alcohol ink, Claudine's new packs of mini paints, our new chipboard, and all of Tim's new Christmas Idea-ology!
We are there as The Stamp Connection ( in case you look in the programme), and even if you are not coming along, everything new is on the website!
I shall be demoing Shrink plastic and UTEE, both my favourite products, and here is a little taster of what you might see!

If you fancy winning this little birdie, you can join in the fun on my blog
Have a very Creative weekend, and if you happen to pop by us at Ally Pally, do say hello!
Jennie

Wednesday 21 September 2011

Keep Calm by Sioux Jenneys

I'm back again and here to share a tag card with you :)


1. I cut two tags from 250gm cartridge paper and used Distress Ink Victorian velvet, faded jeans and broken china on my craft sheet for the background colours. The remains of which were used to colour the other side of the tags a lighter shade.

2. Stamped two of the butterflies from Insects & butterflies 1 in Distress Ink pumice stone and also the calligraphic mat 13 in the same colour in a random fashion before adding the words from the Dance plate in Archival aquamarine and some random stamping of the label from ephemaera 1 plate. in Victorian velvet.

3. Stamped the Keep Calm in Archival aquamarine too and the lovely crown from Crowning glory  in Archival black....with some more random calligraphic mat 13 in pumice stone and again on the reverse sides of each tag too.


4. The front has an oval cartouche stamped with the same crown and the calligraphic mat 13 in Distress Victorian velvet. I roughly cut a smaller oval to attach some tissue tape to and adhered the stamped oval on top with silicone glue.


5. The two tags were fixed together using tissue tape as a hinge....the outside was just a straight piece but I decided to give the inside an added touch by folding the tape back on itself every so often.

6. Some raffia completed the tag card.

Don't forget that tissue tape is on offer this month here.......you would not want to miss a good deal would you?


See you again at the beginning of October! Happy Stamping ;)
xoxo Sioux

Monday 19 September 2011

Alice's Bottle by Tina Barnett

Hello Crafty Peeps!

It's Tina here and I am back with something different using Mabel Lucie Attwell stamps. The stamps I have used are from the Alice in Wonderland range.

I have started with a bottle and covered it with Tissue Tape .


I then stamped out a few of the Mabel Lucie Attwell Alice in Wonderland Stamps on to shrink plastic.


I attached them to a chain and put it around the bottle neck.


I used a piece of stamp board and stamped another Mabel Lucie Attwell stamp on to it. I then coloured it with Promarkers.


I added some Tim Holtz alterations buttons and some foliage.


I popped some Crackle Accents on to the bottle.


I also covered a Chipboard shape with tissue tape.


The other Stamps used are by the The Artistic Stamper .

I hope you like what I have done. See you soon.

Tina xx

Saturday 17 September 2011

Revisiting your past! by Nicky Cresswell

Hiya Stampers, 
Now you may think from the title that I have some deep meaningful look back planned..
EERRRR WRONG
No today I just decided I wanted to revisit one of the arty things I used to do and that was to alter dominoes! 
But with an added bonus!
It makes THE perfect edging to finish off your dominoes, and what's even more brilliant is you can either leave it as is or stain it to the colour you choose.
......
I have 3 to share today, all with slightly different techniques.
First is the basic stamping:
I used the sweet little girl from the 'Our Little Ones elements' plate
I just stamped the image in black stazon then edged with the 'journeymantissue tape.
.......
Next is the alcohol ink background:
 I used a mix of Tim Holtz and Kuretake Zig alcohol inks stippled onto the domino, and then stamped the beautiful bee from the insects & butterflies plate, edged again with the 'journeyman' tissue tape but this time I used some of the alcohol ink to stain it. I also added a little crown charm {after drilling a hole in the domino to hang a jump ring through, I did this b4 I started BTW}
.......
And lastly the alcohol ink, archival ink ghosting: 
{i'm sure there is a proper name for this technique but I don't know it lol}
For this I alcohol inked the base and then wiped it off with a baby wipe, which leaves a subtle colouring on the domino, Next I stamped the mannequin from the 'artists' plate in manganese blue, and the nibs from the same artist plate in the russet archival ink, I then wiped over the images again with a baby wipe which removed the bulk of the colour leaving an almost ghostly image. I finished by stamping the word ART in black stazon. And edged with one of the 'hobgoblintissue tapes, which I stained using the manganese blue ink.
.......
So there you have it.. Just another fab use for Tissue Tape which if you didn't already know is on offer HERE.
Thanks for stopping in, I hope you liked my little revisit.
Until Next Time
STAY INKY

Friday 16 September 2011

Autumn Jigsaw Piece by Alison Hall

Hello Stampers! This week I have altered a jumbo jigsaw piece. It was originally part of a Tweenies puzzle I bought in a charity shop.

First I covered the whole of the back of the jigsaw piece with tissue tape, which is currently on special offer HERE. Then I inked the tape with alcohol inks. I used butterscotch, terra cotta & red pepper. I stamped the Bare Tree twice, using black Archival Ink.

I stamped the leaf, from Tick Tock Flowers, three times on book paper, then cut them out & layered them on the bottom right of the jigsaw piece, with some skeleton leaves.


To make the flower, I cut out a piece of sticky back aluminium sheet, 4x2 inches, inked it with the same alcohol inks as before, peeled off the backing paper & stuck it to some black card, the same size. I stamped the small Tick Tock Flower twice, using Black Stazon, then cut them out, leaving a small border around them, about 1mm. I used a metal tool to emboss the cogs on the flowers, & a wheel tool to edge the flowers. Then I curled the petals, layered them together with a Tim Holtz sprocket gear & long fastener, & glued the flower on top of the leaves.

Finally, I stamped AUTUMN from the Greetings & Words plate, on a piece of alcohol-inked glossy card, edged it with black Archival ink, & attached it to the jigsaw piece with 2 Long Fasteners.

Thanks for looking,
Alison xx

Thursday 15 September 2011

Tissue Tape Your Drawers By Kat Fullman

Hi all, yes I know another naff title (sorry) lol

Anyway I'm back today with my second offering of the month to show what you can do with Tim's fab TISSUE TAPE So here it is.


I bought a job lot of these & they have been sitting on the
craft room windowsill ever since just waiting to be covered.
because the draws are fairly tight I couldn't recover them with paper
as I first intended,
& because it has a plastic type surface any paint would just chip off.
I had the brain wave of using tissue tape,
so these are the stages (pretty self explanatory really)

The draws before I started,


I covered the draws with the tissue tape,
but took it all the way round to the back,
so it slide nicely into the box,


next I covered all the edges of the box part
with the tissue tape,


so far so good, slides in & out nicely,


for covering the box part
I cut white card a couple of mm smaller than the surface,
for all 4 sides & the back,
in Rusty Hinge, Wild Honey & Vintage Photo,
& the C268 Stipple 4x6 background stamp
& got all 5 pieces of card to this stage in Photo below,


I then grabbed lots of different background stamps


& stamped different ones on each of the pieces of card,
before I stuck them down, I took Walnut Stain Distress Stain
& rubbed it all over the areas that had
Tissue Tape on, to colour & age it.


Stuck it all together, & there it was, done.


I think it needs something on the draw fronts
just not sure what? any ideas!

I'll be back on the 25th with my last
tissue tape idea,

Just before I go
I would like to say a huge thanks
for all the amazing comments that were left
for my spice rack project,
I was tickled pink to read them all.

 have a good one!
Kat x.